Understanding Depth of Field in Everyday Photography
Depth of field describes the zone in a photograph that appears acceptably sharp from front to back. It is one of the most useful creative controls in digital photography, because it determines whether the viewer notices a single subject, follows a complete scene, or studies layers of detail across the frame.
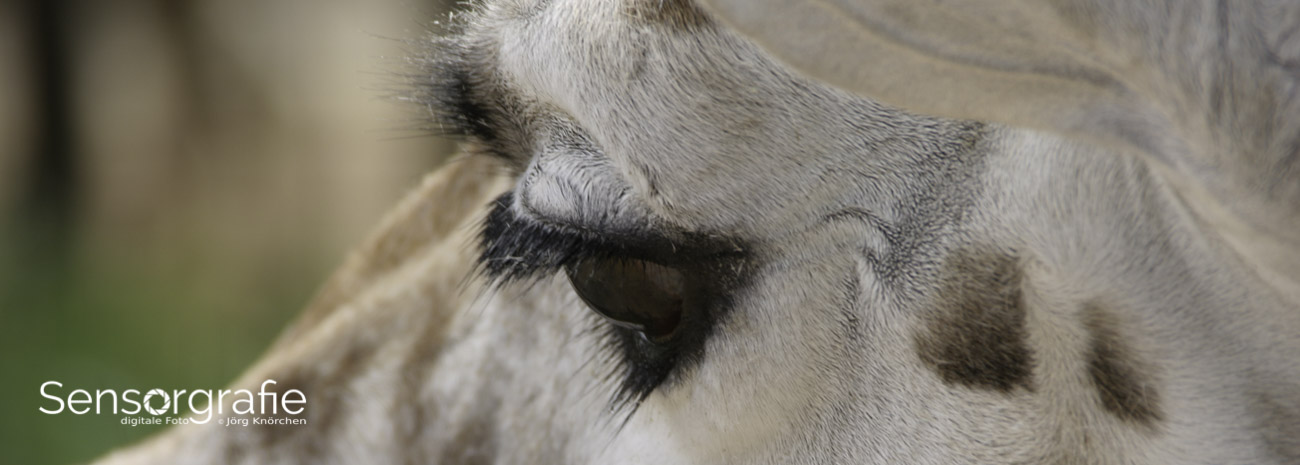
A portrait with softly blurred surroundings, a landscape with sharp foreground rocks and distant mountains, and a macro image with only one insect’s eye in focus may all require different depth-of-field decisions. Aperture is the setting most photographers associate with this effect, but focusing distance, focal length, sensor size, and composition also influence the result.
Depth of field is not a fixed property of a lens. It changes whenever the camera position, framing, aperture, or focus point changes. Learning how these variables interact gives you more reliable control than simply selecting a low f-number and expecting the background to disappear.
What Depth of Field Actually Means
A lens focuses light onto the camera sensor at a specific distance. Objects at that exact distance are rendered with the greatest sharpness, while objects in front of or behind it become progressively less defined. Within a limited range, this blur is small enough that the human eye accepts it as sharp. That range is the depth of field.
The sharp zone usually extends farther behind the focus point than in front of it. At close distances, the difference may be relatively subtle, while landscapes focused near the hyperfocal distance can appear sharp from partway into the foreground to infinity. The apparent sharpness also depends on viewing size, image resolution, subject detail, and the intended output.
Depth of field should be separated from depth perception and background blur. A shallow focus zone can isolate a subject, but the visual quality of the out-of-focus area—often called bokeh—depends on lens design, aperture shape, background distance, and the brightness and structure of background highlights. A lens can produce attractive bokeh without making the in-focus zone extremely thin.
Aperture Controls the Size of the Sharp Zone
Aperture is the opening inside the lens, expressed through f-numbers such as f/1.4, f/2.8, f/5.6, and f/16. A wider aperture, represented by a smaller number, generally creates a shallower depth of field. A narrower aperture, represented by a larger number, generally increases the amount of the scene that appears sharp.
For a portrait, f/1.8 or f/2.8 can separate the eyes from a distracting background. However, the sharp zone may be so narrow at close range that one eye is sharp while the other is already soft. Stopping down to f/4 or f/5.6 may provide enough facial depth while retaining background separation. The ideal aperture depends on subject distance, focal length, and the desired rendering rather than on the number alone.
Landscape photographers often choose f/8 or f/11 as a practical starting point, but smaller apertures are not automatically better. At very narrow settings such as f/16 or f/22, diffraction spreads light across the sensor and reduces fine detail. The image may contain more apparent depth of field while looking less crisp overall. A moderate aperture combined with accurate focusing is frequently the better compromise.
Aperture also affects shutter speed and ISO. Opening the lens can help freeze movement in low light, while stopping down may require a tripod or a higher ISO. For long-exposure landscape work, a stable platform matters; this tripod guide explains the practical considerations that support precise focusing and small-aperture shooting.
Distance Changes Magnification and Focus
Moving the camera closer to a subject reduces depth of field dramatically. This is why macro photography is difficult even at moderate apertures: the subject is close, magnification is high, and the focus zone can become only a few millimeters deep. A flower photographed from a short distance may require careful focus placement or a sequence of images for focus stacking.
Moving farther away generally increases the depth of field. This can be useful for environmental portraits, street photography, and documentary scenes where both the subject and surroundings need to remain recognizable. Distance also changes perspective, however. If you move backward and use a longer focal length to preserve the same framing, facial proportions and the relationship between foreground and background may appear different.
The focus distance should be judged from the sensor plane rather than from the front of the lens. Many cameras mark the sensor position on the body. In everyday work, the difference is usually unimportant, but it matters for close-up photography and for calculating hyperfocal distance with precision.
Background distance is equally important for perceived separation. A subject standing several meters in front of a wall will usually appear more isolated than one pressed against that wall, even when the aperture and focal length remain unchanged. Increasing the distance between subject and background can create a stronger blur effect without changing the lens setting.
Focal Length Affects Framing and Background Rendering
Focal length changes the angle of view. A wide-angle lens includes more of the scene, while a telephoto lens magnifies a narrower portion. When the camera remains in the same position, a longer focal length enlarges the subject and tends to make the background appear more blurred at the same f-number. This is one reason an 85mm or 135mm lens is popular for portraits.
The relationship becomes more nuanced when the composition is kept identical. To maintain the same subject size with a longer lens, the photographer must move farther away. At the same magnification and aperture, the calculated depth of field can become surprisingly similar across focal lengths, especially at ordinary subject distances. Yet the longer lens compresses the apparent spacing between objects and produces a narrower background view, often making the blur look more pronounced.
A wide-angle lens can still produce shallow focus when used close to the subject at a wide aperture. This approach is common in travel, architecture, and environmental portraiture, where the foreground subject is emphasized while the surrounding location remains visible. A telephoto lens, by contrast, can isolate distant subjects and simplify clutter through magnification and a narrow field of view.
The table below summarizes how the main variables usually affect focus depth and visual separation.
| Variable |
Typical change |
Effect on depth of field |
Practical result |
| Aperture |
Wider opening, such as f/2.8 |
Shallower focus zone |
More subject isolation and background blur |
| Aperture |
Narrower opening, such as f/11 |
Deeper focus zone, until diffraction dominates |
More of a scene appears sharp |
| Subject distance |
Camera moves closer |
Depth of field becomes shallower |
Useful for macro and strong subject separation |
| Subject distance |
Camera moves farther away |
Depth of field generally increases |
More forgiving focus in portraits and scenes |
| Focal length |
Longer lens from the same position |
Greater magnification and stronger blur impression |
Tighter framing and compressed background |
| Sensor format |
Larger sensor for equivalent framing |
Often requires longer focal length or closer positioning |
More potential for shallow depth of field |
| Background distance |
Background moves farther behind subject |
Background becomes more defocused |
Cleaner separation without changing aperture |
Sensor Size and Composition Matter
Sensor format influences depth-of-field comparisons because photographers often change focal length or camera distance to achieve equivalent framing. A full-frame camera using an 85mm lens at a particular distance can create a different blur pattern from an APS-C camera using a 56mm lens for a similar angle of view. The aperture value is still f/2, but the framing, magnification, and working distance may not be identical.
When equivalent framing and subject perspective are maintained, a smaller sensor generally provides more depth of field at the same composition and f-number. This can help photographers who need broad sharpness in street, travel, or documentary work. A larger sensor makes shallow depth of field easier to achieve, though lens choice and camera distance remain decisive.
Depth of field also depends on the circle of confusion, a technical standard describing how much blur can still appear sharp in a finished image. Calculators use this value along with sensor size, focal length, aperture, and focus distance. Such tools are useful for planning, but they cannot predict the exact visual impression in every situation because sharpness is affected by display size, eyesight, lens performance, and subject texture.
Composition should therefore guide the technical decision. If a foreground branch, person, or architectural detail is important, include it deliberately and focus at an appropriate distance. A technically broad focus range cannot rescue a composition in which the visual layers are poorly organized.
Practical Focusing Strategies for Different Subjects
For portraits, place the focus point on the nearest eye when the subject faces the camera. Use a wider aperture when the background is distracting, but check whether both eyes fall within the usable sharp zone. With a moving subject, a slightly narrower aperture and continuous autofocus may produce more successful images than an extremely shallow setting.
For landscapes, first decide whether the foreground needs to be prominent. Focus near the hyperfocal distance when a single exposure must cover near and distant details, but verify the result through magnified live view or playback. If the nearest element is very close and the scene extends to infinity, focus stacking can produce greater front-to-back sharpness than stopping down to a diffraction-heavy aperture.
For macro subjects, camera stability and focus technique become critical. A tripod, electronic shutter or self-timer, and manual focus adjustments can reduce small errors. Focus stacking involves combining several photographs made at different focus distances, allowing each frame to contribute a sharp slice of the subject. Moving leaves, insects, or flowers can make this process difficult, so a single carefully timed exposure may remain the best artistic choice.
For street and documentary photography, zone focusing can provide speed. Select a moderate aperture, estimate the subject distance, and use the displayed focus scale or depth-of-field markings when available. Mirrorless cameras can also provide focus peaking, but peaking should be treated as an aid rather than absolute proof of critical sharpness.
Recommendations for Consistent Results
A repeatable workflow helps turn depth-of-field theory into useful field decisions.
- Choose the aperture according to the subject’s required sharpness, not simply the widest available setting.
- Move the camera or subject when possible before changing focal length, because distance changes perspective and background relationships.
- Check the nearest important detail, especially the closest eye in a portrait or the front edge of a landscape composition.
- Use magnified live view, electronic viewfinder preview, or a test exposure to evaluate critical focus.
- Consider focus stacking when the scene demands more sharpness than one aperture and focus distance can provide.
Reviewing images at full size can reveal whether softness comes from shallow focus, camera movement, subject movement, diffraction, or lens limitations. This distinction matters. Increasing the f-number will not fix motion blur, and a tripod will not make an incorrectly focused subject sharp.
Photographers building an online presence can also use depth-of-field choices as part of a consistent visual identity. A portfolio that combines intentional shallow-focus portraits, carefully layered landscapes, and technically controlled close-ups communicates more than equipment specifications. A well-organized professional photography portfolio website gives those visual decisions a clear context for potential clients and viewers.
Depth of field becomes easier to predict when you practice with one lens at a time. Photograph the same subject at several apertures, then repeat the exercise from different distances and with different focal lengths. Compare the sharp zone, background rendering, perspective, and shutter speed. This simple experiment builds a practical understanding that technical charts alone cannot provide.
The most effective approach is to treat aperture, distance, and focal length as connected creative controls. Select the focus point first, decide how much of the subject must be sharp, then adjust the camera position, lens, and exposure settings to support that intention. Take your next series of images with these variables in mind, and review the results to refine your own depth-of-field instincts.